As you may already know, it’s not allowed to use the Applivery SDK in production Apps that are released in the official Apps Stores (Google Play and Apple App Store). In addition, it is a practice that we do not recommend and that could cause the rejection of your App during the reviewing process.
This tutorial will guide you through the process of conditionally excluding the Applivery SDK based on the Environment of the App (i.e.: Live, Test, Staging or Quality).
Step 1 - Create a Configuration Settings files (.xcconfig) for each of your environments #
Go to File > New > File… (Command + N) -> Configuration Settings file choose a descriptive name for your configuration file. For this example we will create two different Configuration Files, one for the development environment (DEV.xcconfig) and another one for the production environment (PROD.xcconfig).
					// App Info
APP_NAME = My Awesome App [DEV]
BUNDLE_IDENTIFIER = com.acme.awesome.dev

// Environment
ENVIRONMENT = DEV

// Applivery Options
APPLIVERY_TOKEN = b7C...2I6
PROD.xcconfig
					// App Info
APP_NAME = My Awesome App [PROD]
BUNDLE_IDENTIFIER = com.acme.awesome.dev

// Environment
ENVIRONMENT = PROD

// Applivery Options
APPLIVERY_TOKEN = 1gxC...66f
EXCLUDED_SOURCE_FILE_NAMES = Applivery.framework
Since we do not want the Applivery SDK to be included into the Production Environment, we have added the following line of code EXCLUDED_SOURCE_FILE_NAMES = Applivery.framework that will exclude the source files of the Applivery SDK during the process of building the App.
Additionally we will take advantage of this Configuration File to also define a different Applivery SDK Token for each of the environments.
Step 2 - Link the Configuration Files with your Project Schemas #
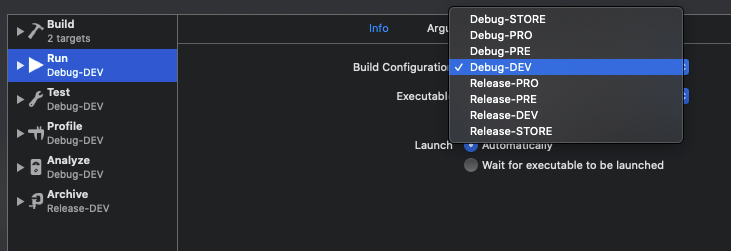
Now that we have multiple configuration files that describe the particularities of your Environments it’s time to link them with your project Schemas. To do so, under your Project Configurations settings, select the appropriate Configuration File by using the Build Configurations dropdown menu.

Step 3 (optional) - Use Configuration File variables in your code #

Additionally, in order to use the Info.plist Keys in your code you can follow the next approach:
					// Get values from Info.plist
public func InfoDictionary(_ key: String) -> String {
  guard let constant = Bundle.main.infoDictionary?[key] as? String else {
    return "CONSTANT NOT FOUND"
  }
  return constant
}

// Example of usage of the above function when starting the Applivery SDK
applivery.start(token:InfoDictionary("APPLIVERY_TOKEN"), appStoreRelease: false)
Step 4 - Conditionally use the SDK #
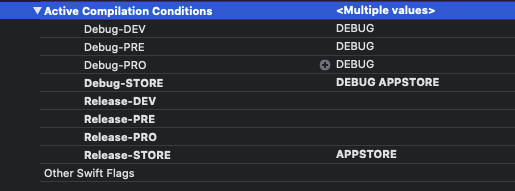
Since the Import of the Applivery SDK has been excluded from the .xcconfig file when building the code we recommend to use Swift Compiler Custom Flags and Active Compilation Conditions to declare a set of constants that will help you conditionally start the Applivery SDK. Here is an example:
					#if !APPSTORE
import Applivery
#endif
struct AppliveryWrapper {
   func setup() {
       #if !APPSTORE && !DEBUG
       let applivery = Applivery.shared
       applivery.logLevel = .info
       applivery.start(token:InfoDictionary("APPLIVERY_TOKEN"), appStoreRelease: false)
       #endif
   }
}

Alternatively, if you do not what to use Configuration Files, you can exclude certain Source File Names under the Build Settings of your project for each of your Project Schemes.