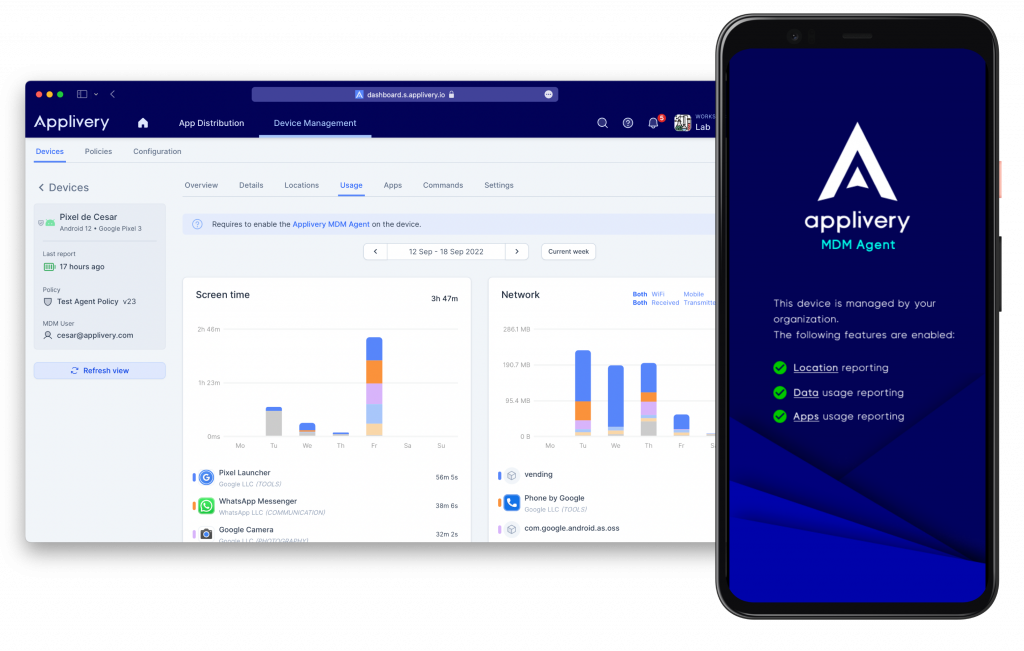
- Geolocation tracking
- Network traffic
- Apps usage
Features #
Geolocation tracking #
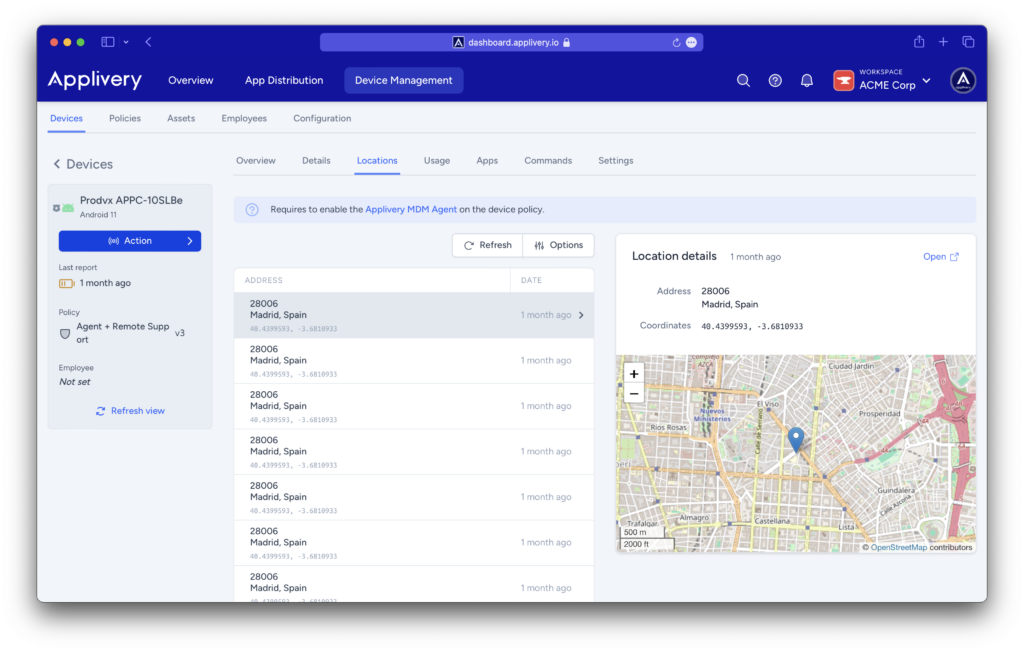
Reports device geolocation (latitude, longitude) including full street address when available. You can see the entire list of locations reported from the dashboard by going to Devices > (Select an Android device) > Locations. Click each line from the list to display the map preview and click Open to open the location in Google Maps.
Devices with a work profile do not have access to this feature.
Apps usage reporting #
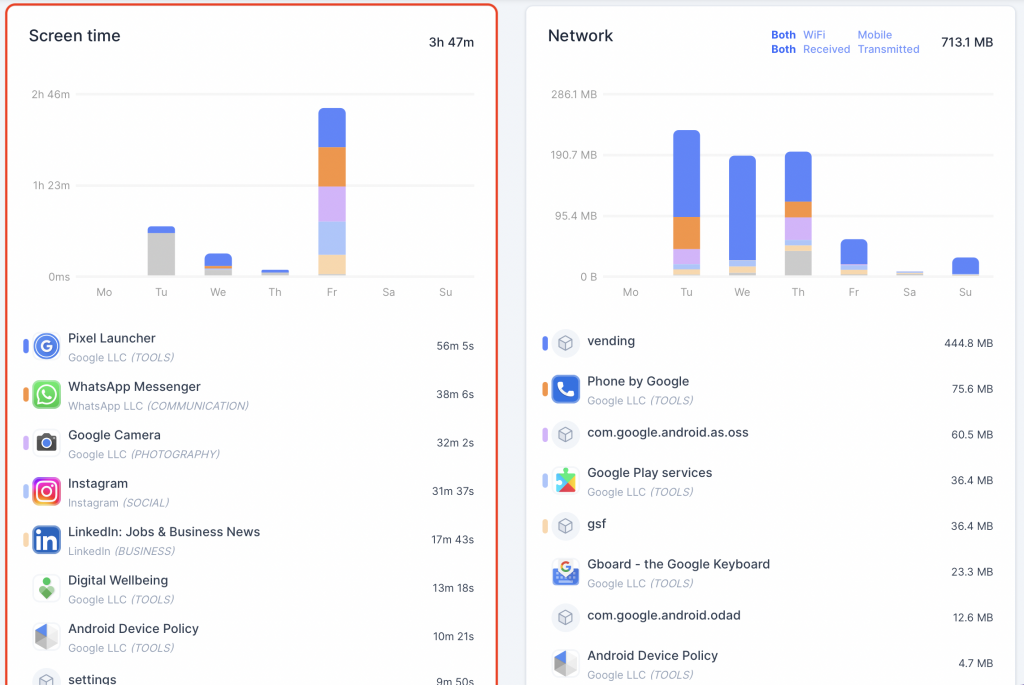
Reports apps usage time by querying foreground activities from Android API’s. Usage analytics will be displayed by the App on a weekly basis. We aggregate usage times by package name, providing also the App name and category when available. The top 5 applications will be colored in different colors for better identification. The rest of the usage time will be aggregated in gray.
To access the reports analytics, go to Devices > (Select an Android device) > Usage > Screen time, then use the selector located above the charts to move across weeks.
For fully managed devices, all apps will be visible.
Network traffic #
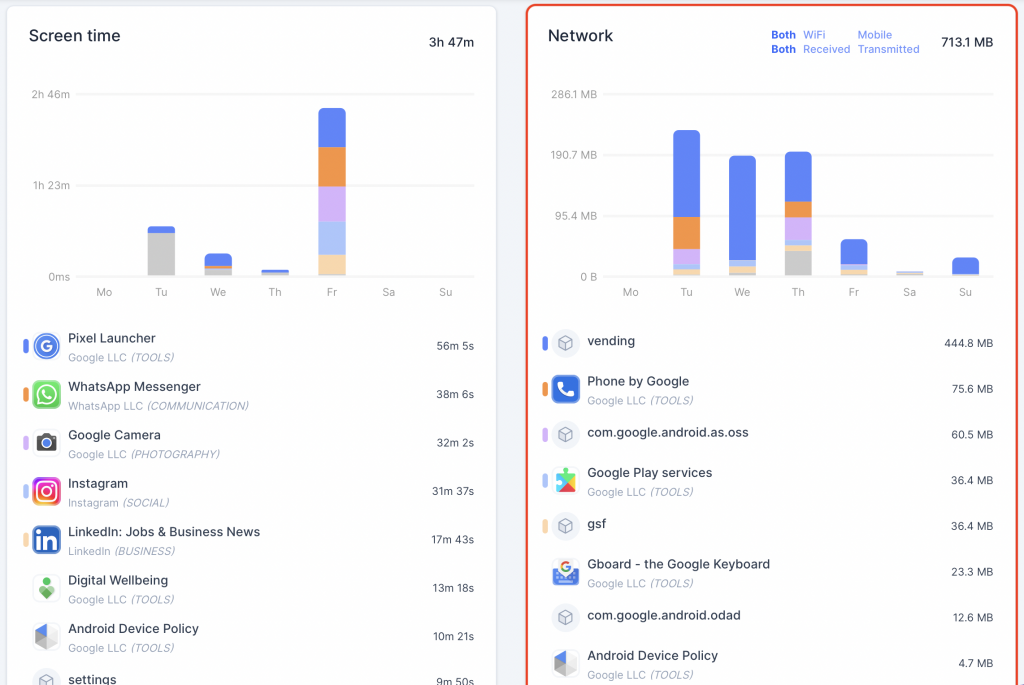
Reports app’s incoming and outgoing network traffic in Mb by querying network usage Android API’s. Network analytics will be displayed by the App on a weekly basis. We aggregate network usage by package name, providing also the App name and category when available. The top 5 applications will be colored in different colors for better identification. The rest of the usage time will be aggregated in gray.
To access the reports analytics, go to Devices > (Select an Android device) > Usage > Network, then use the selector located above the charts to move across weeks. You can use the blue selectors to limit the content and only see WiFi or Mobile traffic or to distinguish between Received and Transmitted network traffic.
Features by plan #
Feature
Starter Plan
Advanced Plan
Geolocation tracking
Sync frequency: every 1h.
Retention: 1 week.
Sync frequency: every 15 minutes.
Retention: 1 month.
Network traffic
Sync frequency: every 24h.
Retention: 1 week.
Sync frequency: every 12h.
Retention: 1 month.
Apps usage
Sync frequency: every 24h.
Retention: 1 week.
Sync frequency: every 12h.
Retention: 1 month.
However, the system may prioritize other processes depending on factors such as network connection status, battery optimizations, or doze mode.
However, some device manufacturers customize Android and may remove this permission or its associated settings screen, making it appear as if the permission is missing. In such cases, there is no need to worry — the Agent will still function correctly. Since the system limitation does not apply on those devices, the app can run in the background seamlessly, as if the permission had already been granted.
We keep your data secure and private #
Enabling the Agent at policy level #
Applivery Device Management Android Agent is enabled at the Policy level. Go to your Android policies from Device Management > Policies. You can use the top filter to just show the Android policies. Click one of them and go to the Agent section (1) from the left side menu.
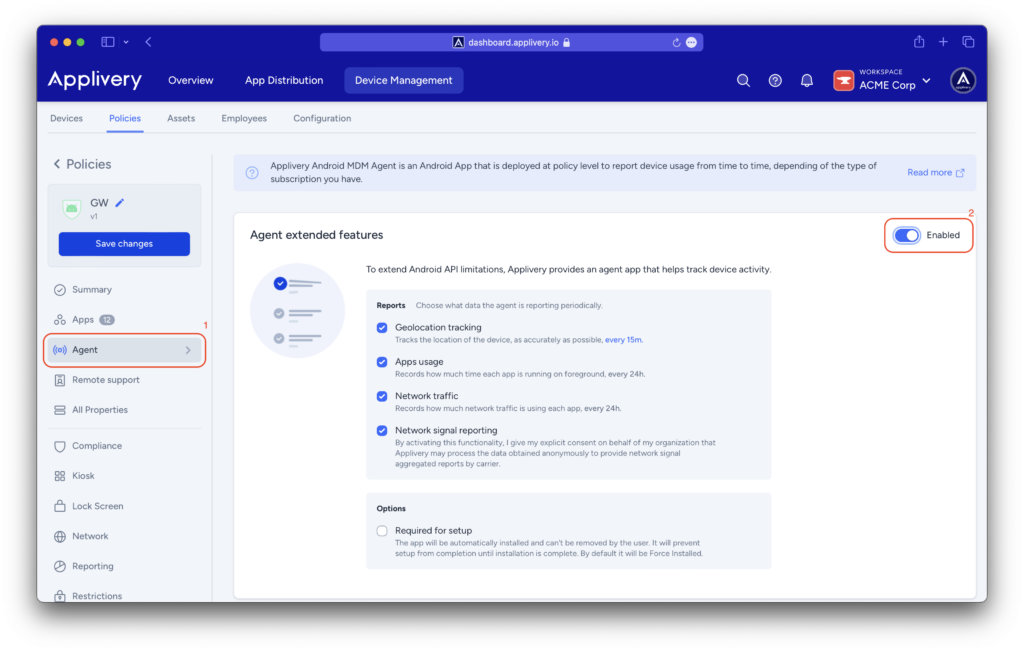
To enable the Android Agent, click the Enable button located at the top right (2).
Last, decide whether you want the agent to be installed in Required for Setup mode. This way is the most common for new devices, and the app will be installed during the enrollment process to ensure it’s installed before the system starts up.
If you don’t select this option, the application will be installed in Force Installed mode, which is the most common scenario, and the agent app will be automatically installed on the devices and cannot be removed.
Don’t forget to click Save changes button before leaving the page to deploy all your changes.
How to programatically launch the agent from your workflow #
As mentioned before, the Applivery Android Agent requires to be opened at least once to get the appropriate permissions and start reporting. Sometimes you may need to programatically launch it from your enrollment process or another app.
To launch Applivery Agent you need to invoke it with an Intent with the following action:
com.applivery.mdm_agent.action.LAUNCH
To ensure that the agent is available at runtime you may need first to query system information about it such as calling:
val intent = Intent("com.applivery.mdm_agent.action.LAUNCH")
if (packageManager.queryIntentActivities(intent, 0).isNotEmpty()) {
    startActivity(intent)
}queryIntentActivities and similar, you need to add the following query info to the caller app Manifest, where com.example.app is the package name of your app: <manifest package="com.example.app">
<queries>
<intent>
<action android:name="com.applivery.mdm_agent.action.LAUNCH" />
</intent>
</queries>
...
</manifest>