Customizing the desktop wallpaper is often seen as a way to reinforce corporate branding on devices managed by the organization. macOS wallpaper settings allow businesses to ensure that every company-owned device displays the enterprise’s logo or trademark.
Administrators can configure the wallpaper with the organization’s logo or any image they choose and apply it to an entire fleet of devices. This customization also allows them to set wallpapers for all users on a device and decide if they should be updated periodically.
Policy configuration #
Step 1 - Upload the image #
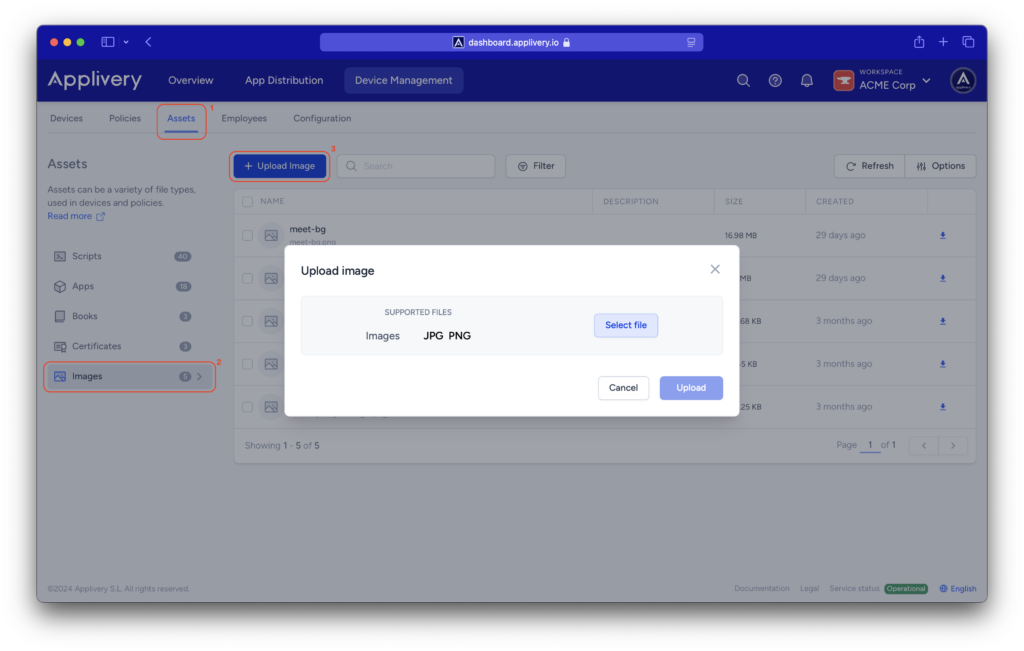
Once in the Applivery dashboard, head to the Device Management section and select Assets (1). Then, go to the Images (2) tab and click the + Upload Image (3) button.
A modal view will appear, allowing you to upload images in .jpg and .png formats.

Step 2 - Configure your policy #
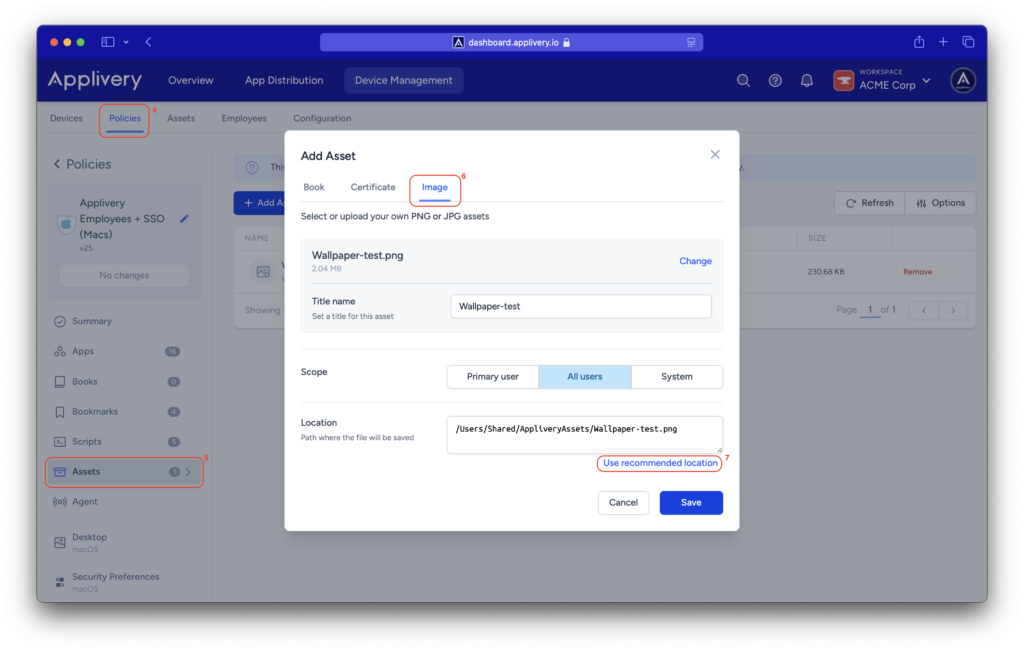
After uploading the image, navigate to the Policies (4) section, and choose the policy where you want to apply the wallpaper (or create a new one). Head to the Assets (5) section from the left-hand menu, and click the + Add Asset button.
In the modal view, switch to the Image (6) tab, where you can either select the image you uploaded earlier or upload a new one. Then, choose the scope: Primary user, All users, or System.
Click the Use recommended location (7) button for a suggested configuration.

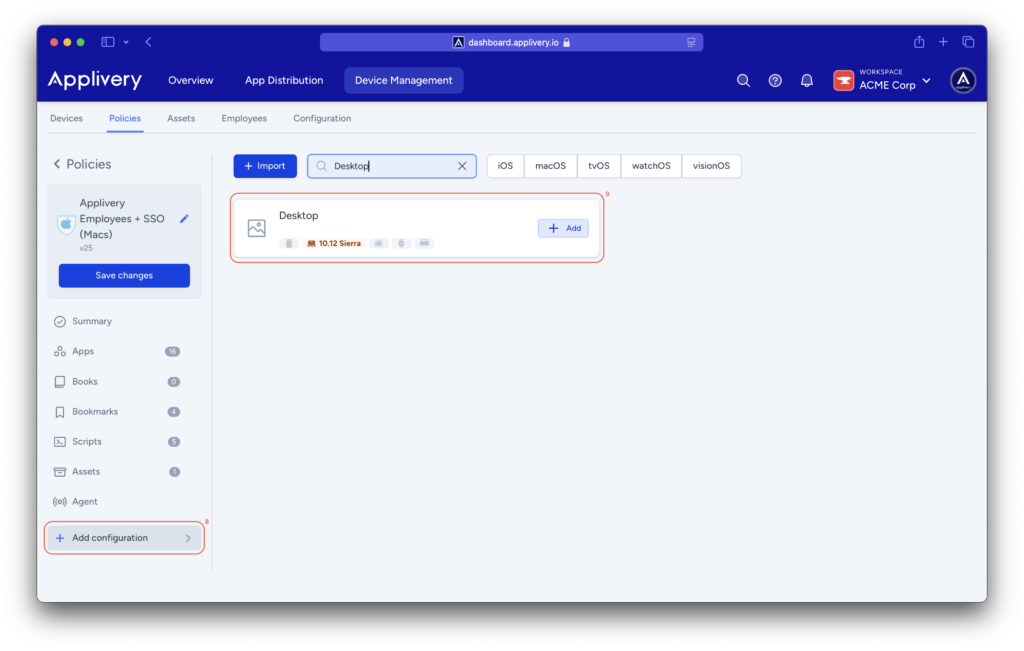
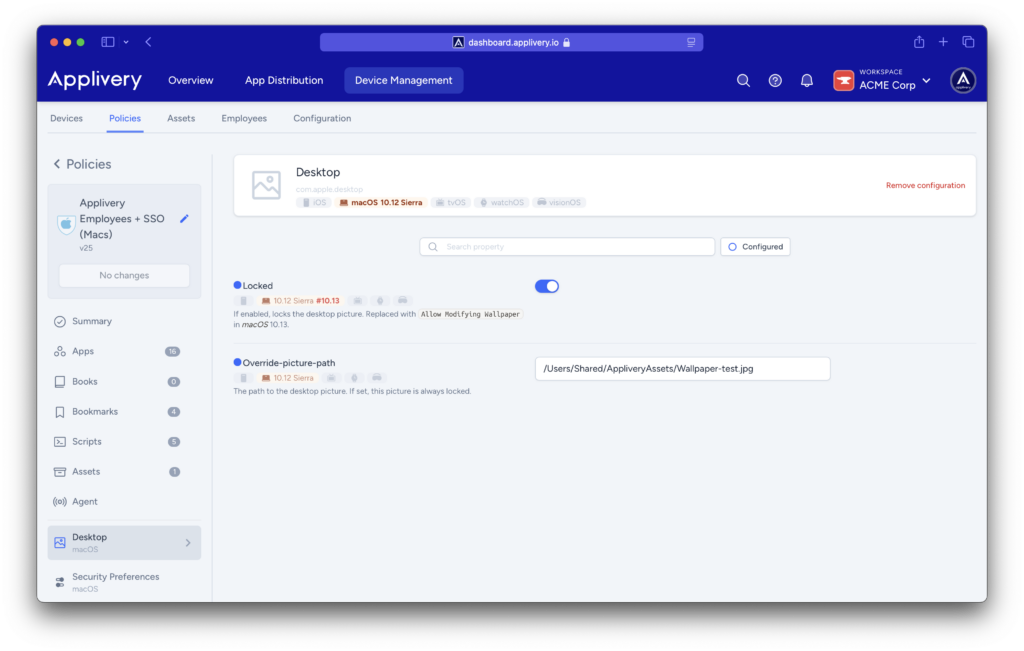
Once the image is uploaded, click the + Add configuration (8) button in the left-hand menu and select Desktop (9) from the available configuration options. You only need to add the path you set when uploading the image (whether you used the recommended path or created one manually).

Additionally, you can enable the Locked setting to prevent users from changing the wallpaper.
Once configured, you will only need to Save changes.
