As you probably already know, the possibilities of the Android Devices Management policies configuration are endless. Below you will find a repository of the most common configurations our users use to configure for their projects.
Kiosk Custom Launcher #
Replaces the home screen with a launcher that locks down the device to the apps installed via the applications setting. Apps appear on a single page in alphabetical order.
- Kiosk Custom Launcher Enabled =
true - Kiosk Customization (optional): there are many options available that you can use to customize Custom Kiosk mode behavior.
We always recommend to enable Network Escape Hatch (networkEscapeHatchEnabled: true) since it prompts the user to temporarily connect to a network to refresh the device policy if a network connection can’t be made at boot time.
					{
  "config": {
    "applications": [...],
    "networkEscapeHatchEnabled": true,
    "kioskCustomization": {
      "deviceSettings": "SETTINGS_ACCESS_ALLOWED"
    }
  }
}
Single app kiosk mode #
The app is automatically installed in kiosk mode: it’s set as the preferred home intent and whitelisted for lock task mode. Device setup won’t be complete until the app is installed. After installation, users won’t be able to remove the app. You can only set this Install Type for one app per policy. When this is present in the policy, the status bar will be automatically disabled.
- App Configuration:
- Install type:
KIOSK
- Install type:
- Policy configuration (optional)
Persistent Preferred Activities:
- Receiver Activity: name of your receiver activity i.e.:
com.applivery.kiosk.demo001/.AppliveryDeviceAdminReceiver - Categories: i.e.
android.intent.category.LAUNCHERandroid.intent.category.HOMEandroid.intent.category.DEFAULT - Actions: i.e.:
android.intent.action.MAIN
We always recommend to enable Network Escape Hatch (networkEscapeHatchEnabled: true) since it prompts the user to temporarily connect to a network to refresh the device policy if a network connection can’t be made at boot time.
					{
  "config":{
     "applications":[
      {
        "packageName":"com.applivery.kiosk.demo001",
        "installType":"KIOSK",
        "defaultPermissionPolicy":"GRANT",
        "permissionGrants":[
         {
           "permission":"android.permission.BIND_DEVICE_ADMIN",
           "policy":"GRANT"
         }
        ]
      }
     ],
     "persistentPreferredActivities":[
      {
        "receiverActivity":"com.applivery.kiosk.demo001/.AppliveryDeviceAdminReceiver",
        "actions":[
         "android.intent.action.MAIN"
        ],
        "categories":[
         "android.intent.category.LAUNCHER",
         "android.intent.category.HOME",
         "android.intent.category.DEFAULT"
        ]
      }
     ],
     "networkEscapeHatchEnabled":true
  }
}
Web app kiosk mode #
You can also use Google Chrome in kiosk mode to display a specific URL as a single app, achieving the desired behavior on your dedicated device.
To set up this configuration, follow the steps outlined in the Single App Kiosk Mode section above, which involves configuring both the Persistent Preferred Activities setting and the Network Escape Hatch.
- Web app configuration:
- Install type:
KIOSK
- Install type:
- Google Chrome configuration:
- Install type:
FORCE_INSTALLED - Managed configuration:
URL allow list:
["allowed URL"]URL block list:
["*"]
- Install type:
* Multiple web apps are allowed, separated by commas, i.e: ["allowed URL1", "allowed URL2"]
					{
  "applications": [
    {
      "packageName": "com.google.enterprise.webapp.xbf6a96eb033caa10",
      "installType": "KIOSK",
      "defaultPermissionPolicy": "GRANT"
    },
    {
      "packageName": "com.android.chrome",
      "installType": "FORCE_INSTALLED",
      "defaultPermissionPolicy": "GRANT",
      "managedConfiguration": {
        "URLAllowlist": "["applivery.com/docs/"]",
        "URLBlocklist": "["*"]"
      }
    }
  ],
  "persistentPreferredActivities": [
    {
      "receiverActivity": "com.android.chrome/com.google.android.apps.chrome.Main",
      "actions": [
        "android.intent.action.MAIN"
      ],
      "categories": [
        "android.intent.category.HOME",
        "android.intent.category.DEFAULT"
      ]
    }
  ],
  "networkEscapeHatchEnabled": true,
  "kioskCustomization": {
    "systemNavigation": "NAVIGATION_DISABLED"
  }
}
Allow install from Unknown Sources #
Sometimes you will need to allow your users to install Apps (.apk or .aab files) from 3rd parties or your Private App Store in Applivery MAM. This is normally blocked by default in all policies so you will need to customize the following policy property to make it possible:
- Advanced Security Overwrites
- Untrusted Apps Policy =
ALLOW_INSTALL_DEVICE_WIDE
- Untrusted Apps Policy =
					{
  "config": {
    "applications": [...],
    "advancedSecurityOverrides": {
      "untrustedAppsPolicy": "ALLOW_INSTALL_DEVICE_WIDE"
    }
  }
}
Allow to install unknown apps #
Sometimes you will need to allow users to grant specific apps permission to install other apps (.apk files) on their device. This is different from the Unknown Sources setting, which allows the installation of apps from sources other than the Google Play Store.
This feature provides more granular control over which apps can install other apps on your Android device. It is often used for apps like file managers or web browsers that may need to download and install .apk files.
Remember that allowing apps to install unknown apps can pose a security risk, opening the door for potentially harmful or unverified apps to be installed on your device.
					{
  "installUnknownSourcesAllowed": true,
  "advancedSecurityOverrides": {
    "untrustedAppsPolicy": "ALLOW_INSTALL_DEVICE_WIDE",
    "developerSettings": "DEVELOPER_SETTINGS_ALLOWED"
  }
}
Network configuration #
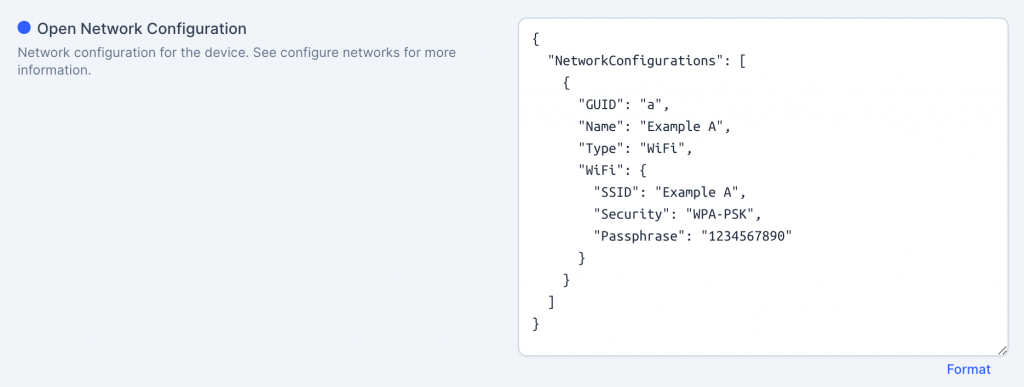
Sometimes you will need to remotely deploy network configuration, including WiFi and others. This is something that can be done by using the Open Network Configuration property, which supports deploying multiple configurations at the same time using the ONC standard.
The most common properties are:
- GUID: unique identifier for this network.
- Name: friendly network name
- Type: type of network. Allowed values are:
VPN,WiFi,Tether,Ethernet,Cellular - Security: Security type. Allowed values are:
WEP-PSK,WEP-8021X,WPA-PSK,WPA-EAP - AutoConnect: Indicating that the network should be connected to automatically when possible
trueorfalse

					{
  "NetworkConfigurations": [{
    "GUID": "a",
    "Name": "Example A",
    "Type": "WiFi",
    "WiFi": {
      "SSID": "Example A",
      "Security": "None",
      "AutoConnect": true
    }
  }, {
    "GUID": "b",
    "Name": "Example B",
    "Type": "WiFi",
    "WiFi": {
      "SSID": "Example B",
      "Security": "WEP-PSK",
      "Passphrase": "1234567890"
    }
  }, {
    "GUID": "c",
    "Name": "Example C",
    "Type": "WiFi",
    "WiFi": {
      "SSID": "Example C",
      "Security": "WPA-PSK",
      "Passphrase": "baseball"
    }
  }]
}
You can read more about Open Network Configuration specs here.